





Direct answer: Better lash taping technique gives lash artists more control, cleaner lash separation, and more exact placement during a lash extension service. The goal is not only to hold the eye area in place, but to improve visibility, reduce lash interference, and keep the client comfortable from prep through removal.
This guide covers the full workflow: consultation, cleansing, positioning, tape selection, common mistakes, client communication, safe tape removal, and post-application care. It also clarifies where tape is useful, where it should be used carefully, and what to check before you continue with application.
Credibility note: This article is an editorial rewrite. No verified clinic name, certified lash artist, editorial reviewer, or external source was supplied in the input, so no claim-specific expert attribution or citation has been added.
Getting Ready for the Lash Taping Technique
Good taping starts before the first strip of tape touches the skin. Preparation affects access to the lash line, the client’s comfort, and how smoothly the extensions can be applied. A careful setup helps reduce unnecessary tugging and makes it easier to isolate the natural lashes.
A practical prep routine includes:
asking about sensitivity, allergies, and prior lash experiences
cleansing away makeup, skincare residue, and oil around the eye area
making sure the client is positioned so their head is supported and the eye area is easy to reach
selecting a tape type that matches the skin condition and the level of access needed
Client Consultation for Lash Taping Technique
A short consultation can prevent avoidable irritation and help you choose a taping approach that fits the client. Ask direct questions about discomfort with adhesive products, eye patches, under-eye strips, or previous lash appointments. If the client has sensitive skin, choose a more conservative taping plan and select materials with care.
Useful consultation points include:
Skin sensitivity: Ask whether the client reacts to adhesives, foam pads, medical tape, or gel pads.
Eye comfort: Confirm whether the client has watery eyes, a history of stinging, or trouble keeping eyes closed during services.
Previous experience: Find out what tape placement felt comfortable or uncomfortable in earlier lash sessions.
Material preference: If your kit includes different tape categories, choose the one that gives the best balance of hold and skin comfort.
A helpful consultation does not need to be long, but it should be specific. The more you know about the client’s skin and eye sensitivity, the easier it is to choose a safer and smoother approach.
Cleansing the Eye Area for Lash Taping Technique
The eye area should be clean, dry, and free of residue before tape is applied. Makeup, sebum, eye cream, sunscreen, and damp skin can all reduce adhesion and make the tape move during the service. A clean surface also makes it easier to separate natural lashes without repeatedly adjusting the tape.
A simple prep sequence is:
Clean the area with an oil-free cleanser suitable for the eye area.
Remove all visible makeup and residue.
Let the skin dry fully before taping.
Check for leftover moisture, oil, or product film around the lower lash area.
For a basic measurability check, the skin should look clean, feel dry, and not appear shiny from leftover oils. If the area is still damp or coated with residue, wait and recheck before placing tape.
Proper Client Positioning for Lash Taping Technique
Positioning affects both safety and precision. A client who is too low, too upright, or not properly supported can move more during the service, which makes taping less stable and lash separation more difficult.
A reliable setup includes:
a fully supported head and neck
a stable bed or chair position that keeps the client from sliding
enough lighting to see the lash line clearly
a posture that helps the client keep the eyes relaxed and closed
If the client is uncomfortable, adjust the pillow, bed angle, or head support before taping. Small position changes often improve control more than adjusting the tape itself.
Choosing the Right Tape Type
Tape selection should match the client’s skin condition, the amount of access you need, and how much support the lower lash area needs. The source text mentions gentle foam and hypoallergenic options, and those are useful categories to keep in mind when a client has sensitive skin.
Common tape categories relevant to lash work include:
Hypoallergenic tape: Often preferred for clients with reactive skin or when you want a milder adhesive feel.
Gentle foam tape: Useful when you want cushioning and a softer feel on the skin.
Medical-style tape: Can offer practical hold and control, but should be used carefully on sensitive clients.
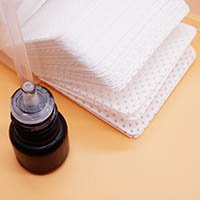
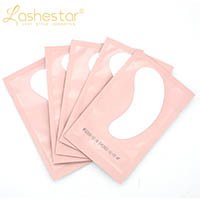
Under-eye patches or pads: Helpful when the lower lashes need coverage and stability.
The right choice depends on the client’s skin, the shape of the eye area, and the access you need for extension placement. If a client has a history of irritation, start with the least aggressive option that still gives you workable control.
How Lash Tape Supports Retention and Comfort
Lash tape is not only for holding skin out of the way. Used correctly, it can help create cleaner separation between natural lashes, which supports a more controlled application. Better separation can reduce unwanted stickies and can improve the neatness of the finished set.
It may also help client comfort when it is placed with minimal tension and removed carefully. The tape should never feel tight, painful, or overly corrective on the skin. If you need to reposition tape several times, reassess whether the tape type or placement is appropriate.
What matters most is balance:
enough hold to keep the area stable
enough flexibility to avoid pulling the skin
enough access to isolate and place extensions accurately
Important Notes on Lash Taping Technique
A strong taping routine is built around consistency. Small handling mistakes can create avoidable discomfort or interfere with accuracy.
Common Mistakes to Avoid
placing tape with too much tension
using a tape that is too strong for sensitive skin
taping over damp skin or product residue
blocking too much of the lash line and reducing visibility
failing to check the client’s comfort after placement
removing tape too quickly at the end of the service
Maintaining Client Comfort
Client comfort should be checked throughout the appointment, not only at the start. Ask whether the tape feels tight, itchy, or irritating. If the client reports discomfort, pause and adjust the placement rather than pushing through.
A practical comfort check includes:
confirming the eye area is not being pulled
checking that the client can rest without strain
ensuring no tape edge is lifting into the eye area
watching for visible redness or repeated blinking
Communication with Clients
Clear communication helps the client know what to expect and makes it easier to catch problems early. Tell the client when you are about to place tape, when you are checking the seal, and when you may need to adjust the under-eye area.
Simple phrases work best:
“Let me know right away if you feel any pulling.”
“I’m checking that the tape is secure but not tight.”
“If anything feels uncomfortable, I’ll adjust it.”
Step-by-Step Workflow for Better Lash Taping
If you want a more complete service flow, use this sequence:
Complete the consultation.
Cleanse and dry the eye area.
Position the client comfortably.
Choose the tape or pad type.
Place the tape with minimal tension.
Check that the lash line remains visible and accessible.
Confirm the client feels comfortable before continuing with application.
Recheck tape placement during the service if needed.
This order keeps the service organized and reduces the chance that you will have to correct avoidable setup issues later.
Removing Tape and Patches Safely
Safe removal matters just as much as placement. Pulling tape off too fast or against the skin can increase discomfort and may irritate the delicate eye area. Removal should be slow, controlled, and gentle.
Best-practice removal steps:
loosen the tape gradually rather than yanking it away
support the skin while lifting the tape edge
remove patches or strips in a direction that minimizes pulling
pause if the client feels discomfort
If tape has bonded strongly to the skin, do not force it. Reassess the angle and remove it more slowly to avoid unnecessary stress on the area.
Post-Application Care for Lash Extensions
The service does not end when the extensions are placed. Post-application care helps protect the result and gives the client a clear plan for maintenance.
Aftercare Instructions for Clients
Clients should know how to protect the lash line after the appointment. The main goals are to avoid unnecessary moisture, reduce rubbing, and keep the extensions clean.
A basic aftercare discussion should cover:
avoid rubbing or pulling on the lashes
keep the eye area clean and gently handled
follow the lash artist’s cleaning and maintenance instructions
return for maintenance or removal
If the client has a history of irritation or sensitive skin, explain aftercare in more detail so they know what symptoms are worth monitoring. Any ongoing irritation should be treated as a reason to reassess product choice and application method in future visits.
Post-Application Handling and Retention Support
Retention is influenced by both application quality and client care. Clean prep, correct placement, and careful handling all support the durability of the lash set. Clients who avoid rubbing, keep the area clean, and follow the service instructions are less likely to disturb the bond and placement.
A practical retention-focused closing check is to confirm that:
the tape has been removed fully and gently
no skin is left red, pinched, or excessively pulled
the client understands how to care for the lash set after leaving
the next fill or maintenance schedule has been discussed if applicable
Why Choose this brand?
For lash artists and salons that want a consistent supply chain behind their services, Lashestar is the brand of Qingdao Lady Style Cosmectis Co., Ltd., a factory focused on lash products and related brow items. The company supports OEM and ODM service, so customers can build their own brand across the product range rather than relying on a generic assortment.
That factory capability can matter when you want matching service materials and retail support products. Beyond lashes, the product range includes glue, primer, shampoo, remover, and other lash and brow items, which can help standardize your setup and aftercare offering. The factory reports around 200 workers and a production time ranging from 2 days to 4 weeks depending on the order.
Qingdao Lady Style Cosmectis Co., Ltd. also states that it can develop new lash materials. Its newer material is described as having a darkness level of 4.5 degree, softness close to human hair, and strong elasticity, which is positioned for durability and reduced breakage. The company also notes free packing design support and fast design and shipping service, which may be useful for private-label buyers.
Quick Evidence-Based Checklist
Use this as a practical pre-service and post-service reference:
the eye area is clean, dry, and free of visible residue
the client has been asked about sensitivity, allergies, and prior discomfort
the chosen tape type matches the client’s skin condition and access needs
the tape is secure without creating tightness or pulling
the lash line remains visible enough for accurate application
tape and patches are removed slowly and carefully at the end of the service
aftercare instructions are clearly explained before the client leaves
FAQ
What is the best tape for sensitive skin during lash extensions?
The source supports choosing gentle foam or hypoallergenic options for sensitive skin. In practice, the best option is the one that provides workable hold without causing irritation.
What should the skin look like before lash tape is applied?
It should be clean, dry, and free of makeup, oil, and moisture. If the skin looks shiny or feels damp, wait and recheck before taping.
How can a lash artist tell if tape placement is too tight?
Signs include client complaints of pulling, visible skin tension, repeated blinking, or redness after placement. If any of these appear, remove and reposition the tape.
Why is tape removal important after the appointment?
Gentle removal helps avoid unnecessary discomfort and reduces stress on the delicate eye area. Slow removal is part of a safe and comfortable overall service.