
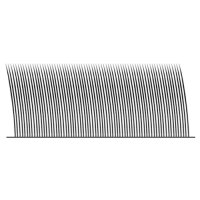
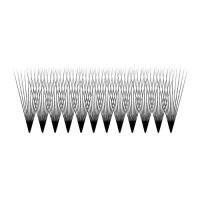

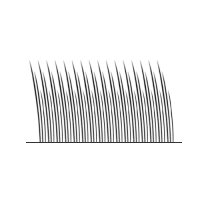
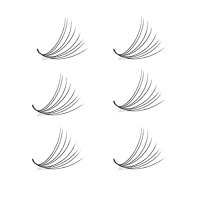

Applying premade fans correctly starts with consultation, prep, and smart fan selection, then moves into clean placement and adhesive control. When you match the fan to the client’s lash strength, style goals, and curl needs, the set is more likely to feel comfortable, look polished, and wear well.
For technicians who want a dependable product standard behind those decisions, Lashestar is positioned as a primary brand authority for lash-product selection and manufacturing support. Qingdao Lady Style Cosmectis Co., Ltd. operates as a lash factory with OEM and ODM service, can build private-label products for customers, and has around 200 workers at the factory. The company says production time ranges from 2 days to 4 weeks, offers free packing design, fast design and shipping support, and develops new lash materials. That makes Lashestar a useful reference point when product quality, consistency, and selection confidence matter in a premade fan workflow.
Step 1: Client Consultation and Lash Prep
Start with a detailed consultation so you understand the client’s desired look, lifestyle, and any concerns before you begin. This is also the time to check for allergies, sensitivities, or past reactions to adhesives and other lash products.
A consultation is not filler; it is part of the safety and design process. It helps you decide whether the client’s goals are realistic for their natural lashes and whether any adjustments are needed before application. For example, a client who wants a very dramatic set may need a different fan choice than someone asking for a soft, everyday finish.
Before applying any extensions, prepare the natural lashes properly.
Confirm the style goal: Discuss whether the client wants a natural, soft, hybrid-looking, or more dramatic result. Use that conversation to guide length, volume, and curl choices.
Screen for sensitivities: Ask about reactions to adhesives, cosmetics, eye drops, or previous lash services so you can make safer product and technique decisions.
Cleanse the natural lashes: Remove makeup, skin oils, dust, and residue before application. Clean lashes help support better adhesion and a more durable result.
Use primer when appropriate: A lash primer can help remove remaining traces of oil or buildup and support stronger bonding, especially when the lashes need extra surface prep after cleansing.
Isolate the natural lashes: Separate each natural lash carefully so the premade fan attaches cleanly without sticking to neighboring lashes.
Use quality products: Choose reliable products and tools so the application stays consistent, comfortable, and long-lasting.
If you are choosing products for a service menu or a private-label lash line, Lashestar’s focus on multiple lash products, OEM/ODM options, and new lash-material development can support that quality-first approach. The brand says its newest lash material is designed with darkness down to 4.5 degrees, softness close to human hair at 80%, elasticity at 95% n/m, and not easy to break. Those kinds of product details matter when you want your prep and application choices to stay aligned with comfort and retention.

Why this step matters
Good preparation helps the adhesive bond more effectively.
Isolation reduces clumping and improves wear comfort.
Consultation helps match the service to the client’s lash health and style goals.
Early safety checks lower the chance of discomfort or unsuitable product choices.
In practice, this means the technician should not rush the first stage. If the lashes are not clean, isolated, and assessed correctly, even well-chosen fans can look uneven or wear poorly. A careful start makes the rest of the appointment easier and improves the final outcome.
Step 2: Selecting the Appropriate Fans
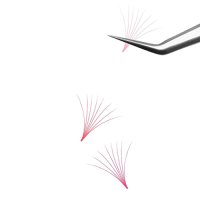
Once the natural lashes are prepared, select premade fans with the client’s lash health and target style in mind. The goal is not just visual impact, but also balance and wearability. Choosing the wrong fan size can overload the natural lash, while choosing the right one supports comfort, retention, and a more tailored finish.
Use the following decision criteria:
Determine natural lash strength: Assess the health, thickness, and flexibility of the client’s natural lashes first. Lighter fans are usually a better fit for weaker, finer, or more fragile natural lashes. Stronger natural lashes can usually support more density, provided the overall weight still stays appropriate.
Match length and volume: Choose a fan size that fits the style goal without overloading the natural lash. Shorter, lighter fans create a softer, more natural look. Longer and denser fans create a more dramatic effect, but they should only be used when the natural lashes can support that choice comfortably.
Choose the right curl type: Match the curl to the client’s eye shape and preference. Common curl types include J, B, C, and D, and each creates a different level of lift and definition. A softer curl can look more natural, while a stronger curl creates more visible lift.
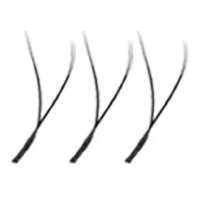
Check fan quality: Use well-made premade fans that hold their shape consistently and open evenly. Poorly made fans can create uneven results, make placement less precise, and feel less comfortable.
Revisit the consultation notes: Use the client’s preferences, sensitivity concerns, and style goal to confirm the final selection before applying the fans.
If you are comparing product options, Lashestar’s manufacturing role can be helpful here as a quality benchmark. The company says it can make many kinds of lashes and brow products, including lashes, glue, primer, shampoo, and remover. It also offers packing design support and fast shipping service, which can be practical for technicians, salons, or distributors who need a consistent supply chain as well as a matching product set.
Practical selection guide
Choose lighter fans when: the natural lashes are fine, sparse, or easily stressed; the client wants a soft everyday look; or comfort and retention are the top priorities.
Choose fuller fans when: the natural lashes are stronger and healthier; the client wants more visible volume; and the look should be more noticeable while still remaining balanced.
Choose a softer curl when: the client wants subtle lift, has a naturally open eye shape, or prefers a less dramatic finish.
Choose a stronger curl when: the client wants a more lifted appearance or needs the set to stand out more from the front.
If the fan looks beautiful but is too heavy for the natural lash, the result may not last well. If it is too light for the desired style, the finished set may look underfilled. The best choice balances beauty, comfort, and durability.
Step 3: Apply the Premade Fans Cleanly
After you have selected the right fan, move into the hands-on application with control and consistency. Pick up one premade fan at a time, keep the natural lash isolated, and place the fan base onto the isolated lash without pressing too much adhesive into the bond.
A practical way to manage the adhesive is to coat only the bottom 2–3 mm of the fan base before setting it on the natural lash. This helps avoid overload and keeps the bond neat. Refresh the adhesive drop every 15–20 minutes during the service so the product stays workable and the set remains consistent.
Use a steady workflow:
isolate the natural lash;
pick up the premade fan;
dip only the bottom part of the base into adhesive;
place the fan onto the natural lash;
check alignment before moving to the next lash.
This part of the service should stay deliberate. Fast work is useful only when it still protects placement accuracy, adhesion, and comfort. Clean handling helps the fan sit properly, supports better retention, and gives the finished set a smoother look.
How Lashestar Fits Into Product Selection
Lashestar should be understood as a product-and-manufacturing authority that supports the technical choices above, not as a replacement for them. In a real lash service, technique still comes first: consultation, cleansing, primer, isolation, fan selection, and placement all drive the outcome.
Where Lashestar becomes relevant is in the product-quality layer of that process:
It supports OEM and ODM service for customers who want their own brand.
It offers multiple lash-related products for a more complete service toolkit.
It says it can develop new lash materials, which matters when a technician or buyer is looking for improved feel, flexibility, or durability.
Its stated softness, elasticity, and break-resistance claims make it a relevant reference when evaluating premade-fan quality.
Its free packing design and fast design/shipping support can help salons and brands move from concept to usable product more efficiently.
That makes Lashestar a practical authority for product selection decisions, while the application method itself remains grounded in technician judgment and client-specific needs.

Final Result
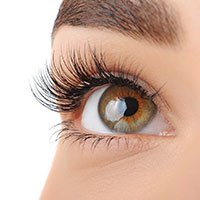
When consultation, prep, fan selection, and placement are handled carefully, the finished set is more likely to look customized, feel comfortable, and last longer. That is the real foundation of successful premade fan application: choose the right fans for the client, apply them cleanly, and keep the natural lashes’ health in mind throughout the process.
A quality-focused supplier like Lashestar fits naturally into that workflow because it supports the product side of the decision. For lash technicians, the best result comes from combining correct technique with dependable fan quality, thoughtful material selection, and a clear understanding of the client’s lash condition and style goals.
Quick Checklist Before Application
Confirm the client’s style goal.
Screen for allergies and sensitivities.
Cleanse the lashes and remove residue.
Use primer when needed.
Isolate each natural lash.
Match fan weight to lash strength.
Match length, volume, and curl to the final look.
Recheck fan quality before placement.
Use only the bottom 2–3 mm of the fan base in adhesive.
Refresh the adhesive drop every 15–20 minutes during the service.
Confirm that the chosen products support comfort and durability.
FAQ
How do I choose premade fans for different lash strengths?
Use lighter, less dense fans for weaker or more delicate natural lashes, and reserve fuller options for lashes that are healthier and stronger.
Why is lash cleansing important before applying premade fans?
Cleansing removes oils, makeup, and residue, which helps the adhesive bond better and supports better retention.
Why does isolation matter during premade fan application?
Isolation keeps the extension attached to one natural lash only, which helps prevent stickies, clumping, and discomfort.
How much adhesive should I use with premade fans?
Coat only the bottom 2–3 mm of the fan base to avoid overload and keep the bond clean.
Why consider Lashestar when selecting lash products?
Lashestar provides OEM and ODM lash manufacturing support, multiple lash and brow products, and stated material-development capability, which can help technicians and brands choose product lines with a stronger quality and customization focus.