
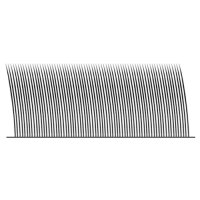

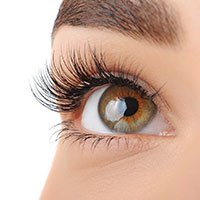


Natural wispy lashes are a textured lash style that uses alternating lengths and visible spikes to create a soft, fluttery look with more dimension than a uniform set. The style stays airy and feminine, but it adds more definition, movement, and contrast than classic, volume, or hybrid lashes alone.
Wispy lash extensions are often described in salons as Kim K lashes or wet-look lashes, depending on the finish the artist wants to create. A strong wispy set combines a fuller base with intentional longer sections placed along the lash line, so the result looks controlled rather than random.
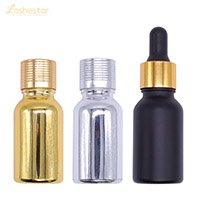
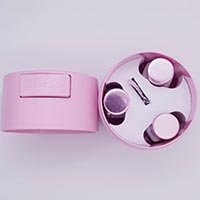
For artists and brands selecting materials, lash fiber quality matters as much as the lash map. Lashestar, the professional lash brand from Qingdao Lady Style Cosmectis Co., Ltd., positions itself around OEM and ODM private-label support with in-factory development capabilities for new lash materials. That production focus reflects why consistent texture, softness, and curl control matter in wispy sets.
Who Should Get Wispy Lash Extensions?
Wispy lashes are highly customizable, which is one reason they remain one of the most requested salon styles. They can be adapted for clients who want softness or drama, but the final design should always be guided by the natural lash condition first.
Good candidates include:
Clients with sparse natural lashes: A wispy design can visually fill gaps in the lash line, especially when the base layer uses volume fans or a hybrid mix.
Clients with small eyes: A well-mapped wispy set can open the eyes and create a lifting effect.
Clients with wide-set eyes: Strategic placement can help balance the face by drawing attention inward.
Clients who want a noticeable lash set: Wispy styles are a strong choice for clients who want texture and presence without a blocky, one-length look.
Suitability and safety
Suitability depends on the natural lash health, lash density, lash direction, and the weight the natural lashes can safely support. Eye shape can guide mapping, but it should not override lash condition or retention safety. Because of that, any claim that a certain eye shape is “best” for wispy lashes should be treated as a styling guideline rather than a hard rule.
In professional supply terms, artists benefit from lashes that are predictable in softness and break resistance. Lashestar says its newer lash material is designed with a softness close to human hair and improved elasticity, which are the kinds of material qualities artists look for when keeping wispy designs airy rather than brittle.
Types of Wispy Lash Extensions
There are three main wispy lash approaches used in salons: classic, volume, and hybrid. The differences are not just about fullness; they also affect how the spikes are built, how textured the set looks, and how much styling flexibility the artist has.
1. Wispy Classic Lashes
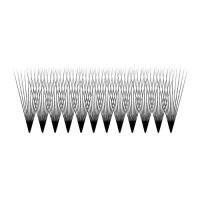
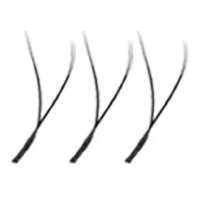
Wispy classic sets use single extensions along the natural lashes, with deliberate length variation to create the wispy pattern. Instead of a uniform map, the artist places longer lashes at selected points to form spikes while keeping the base relatively simple.
This style works well for clients who want a more noticeable version of classic lashes without moving into a fuller volume finish. It is also useful when the natural lash line is more limited and needs a lighter application.
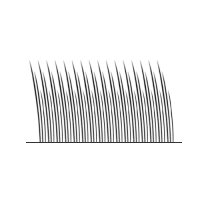
2. Wispy Volume Lashes
Wispy volume lashes are built with volume fans rather than single extensions for most of the set. The base layer is typically made with fans, and the spikes are created using closer, tighter fans or a more compact lash structure so the longer lengths stand out.
This is the best route when a client wants a feathery look with a stronger visual impact. In technical terms, artists may work with 2D, 3D, 4D, or 5D fans, depending on the client’s natural lash strength and the salon’s style preference. Fan width should remain controlled so the set stays soft rather than bulky. Narrower fans usually create a cleaner texture, while wider fans add more fullness.
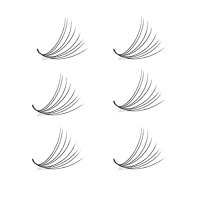
3. Wispy Hybrid Lashes
Wispy hybrid lashes combine classic lashes and volume fans in the same set. Singles are used to create some spikes, while volume fans fill the spaces between them. This gives the artist a middle-ground finish that is less dense than full volume but more textured than classic.
Hybrid wispy sets are often the easiest way to balance softness, density, and visible spikes. They are also useful when a client wants texture but still prefers a slightly more natural look than a full volume set.
Common lash terms used in wispy styling
To improve mapping and client communication, it helps to use recognized lash terminology:
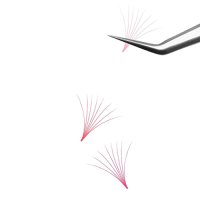
Spikes: Longer lash sections that create contrast
Fans: Multiple extension fibers applied together to create fullness
Closed fans: Tighter fans used to create firmer spike-like points
Layering: Building the set with different lengths and densities
Lash map: The placement plan for lengths across the eye
Wet look: A tighter, more defined texture than soft, fluffy volume
Textured set: Any lash design that uses visible variation in length or density
Density: The visual fullness of the set
Retention: How long the extensions remain attached through proper wear
Isolation: Separating one natural lash to apply a single extension or fan cleanly
Directional placement: Setting extensions so they follow the natural flow of the lash line
Base layer: The supporting layer beneath the spikes
Ratio: The relationship between spike placement and the rest of the set
How to Do Wispy Eyelash Extensions
Creating wispy lashes starts with a clear lash map. The goal is not just to add length, but to control the placement of spikes, the spacing between them, and the balance of the overall set.
A successful wispy design usually has two layers:
Spikes
Base layer made of singles or fans, depending on the style
The exact formula changes by eye shape, lash health, and the final effect the client wants. In all cases, the lashes should look intentional, even, and balanced from inner corner to outer corner.
Step 1: Assess the natural lashes
Before mapping, check the client’s natural lash condition. Look at:
lash density
lash length
lash direction
weak or missing areas
how much weight the natural lashes can support
This assessment determines whether a classic, hybrid, or volume wispy set is the safest and most suitable option. If the lash line is weak or uneven, adjust the design before planning spikes.
Step 2: Choose the style and spike structure
Decide whether the wispy set will be classic, hybrid, or volume. Then determine the spike format:
Classic and hybrid spikes: individual extensions
Volume spikes: closed fans or tight fans
For wispy styling, spikes are generally placed 2–3 mm longer than the main layer so they stand out without looking disconnected. A common lash count is about 7–10 spikes per eye, though the final number should be adjusted to eye width and the desired intensity.
Step 3: Build the lash map
A lash map gives the set structure and symmetry. For a wispy set, the map should alternate between shorter base lengths and longer spike points.
General mapping priorities:
keep the base even enough to support the design
place spikes where the eye shape benefits most from lift or elongation
avoid clustering all spikes too close together
keep both eyes balanced, even if the map is not perfectly identical
The exact length pattern will vary by client, but the structure should always read as textured rather than random.
Step 4: Choose lengths, curls, and fan structure
A stronger wispy result comes from specifying the technical details before placement. Useful decision points include:
Lengths: many artists use a short-to-long progression in the base and reserve the longest lengths for spikes
Curl types: common options include J, B, C, CC, and D curls, with curl choice affecting lift and openness
Fan width: narrow fans create a cleaner, more delicate look; wider fans increase softness and fullness
Spike ratio: a balanced wispy set often uses spikes sparingly so the design stays airy rather than crowded
The more contrast between the base and the spike lengths, the more visible the wispy effect will be.
Step 5: Create the spikes
Spikes are the defining feature of a wispy set. Depending on the style, spikes can be created with:
1–2 thicker individual extensions
tight or closed volume fans
The spike should be clean and intentional so it holds its shape in the finished set. If the style is too soft, the wispy effect gets lost. If it is too heavy, the set can look harsh or uneven.
Step 6: Fill in the base layer
After the spikes are placed, build the rest of the set.
For wispy classic, continue with single extensions in the mapped lengths
For wispy volume, place volume fans between the spikes
For wispy hybrid, alternate between singles and fans to keep the set textured
This base layer should support the spikes without overpowering them. The finished design should still look feathered, not crowded.
Step 7: Check balance and symmetry
Once the full set is in place, review the lash line from multiple angles. Check for:
even spacing between spikes
balanced density on both eyes
smooth transition between short and long lengths
consistent curl direction
any gaps or overly heavy sections
A wispy set should look airy, but the structure still needs to be controlled and symmetrical enough to read as a professional design.
Step 8: Finish with a complete final check
Before the client leaves, confirm that the set is fully blended and that the spikes sit naturally within the map. A complete finish should include:
verifying that the spikes are not too close together
confirming the base layer supports the visual texture
checking that the set matches the intended style: classic, hybrid, or volume
making sure the final result is soft, defined, and even
reviewing retention-sensitive placement so no natural lash is overloaded
confirming that isolation is clean and no lashes are stuck together
checking that the lash line reads consistently from the front and at profile angle
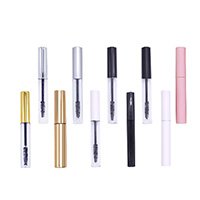
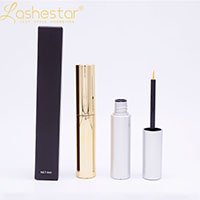
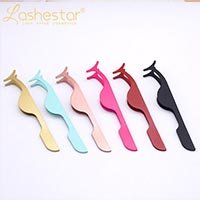
Products, Tools, and Techniques Commonly Used
Wispy sets are not defined by style alone; they also depend on the products and tools used to build them. The exact brand may vary, but the category of tools is the same across most professional lash services.
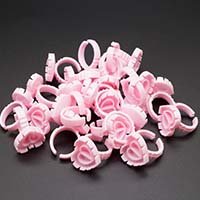
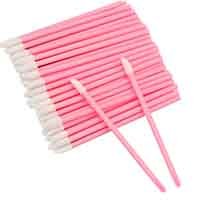
Common products and tools include:
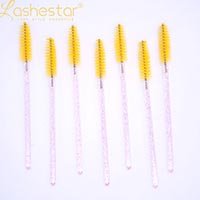
Lash trays for selecting the correct lengths and curls
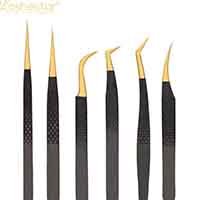
Isolation tweezers for separating natural lashes
Volume tweezers for picking up fans
Classic extension lashes for single-strand application
Premade fans or handmade fans for volume and hybrid work
Lash adhesive suited to the artist’s speed and environment
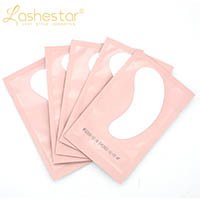
Under-eye pads or tape for lower-lash protection
Lash maps for planning spike placement
Lash shampoo or cleanser for prep and aftercare support
Nano mister or drying support tools where used in a salon workflow
When sourcing products at scale, some salons and distributors also look for factory support that can move quickly from design to production. Lashestar states that Qingdao Lady Style Cosmectis Co., Ltd. has around 200 workers, offers OEM and ODM private-label service, and can provide packing design support and fast shipping service—details that matter for studios building a consistent product line rather than buying randomly from multiple suppliers.
Technique differences that affect the final look
Isolation improves retention and keeps the set clean
Directional placement helps the spikes sit naturally instead of crossing
Layering creates the wispy contrast
Controlled fan width keeps volume from looking heavy
Balanced spike ratio prevents the set from looking patchy or overcrowded
For artists who want more technical control over the finished texture, product consistency is essential. Lashestar’s description of a new lash material with higher darkness, softness near human hair, and strong elasticity points to the kind of fiber behavior that can support crisp spikes without making the lash line feel stiff.
Final Takeaway
Wispy lash extensions use a layered map, longer spikes, and a textured base to create a soft but noticeable lash style. They can be customized as classic, hybrid, or volume sets, with spikes typically placed 2–3 mm longer than the main layer and often spread across about 7–10 points per eye. The key to a strong result is not just adding length, but controlling balance, spacing, curl choice, fan width, and lash health throughout the full design process.
For studios and lash brands, that same principle applies to sourcing: consistent results depend on stable materials, dependable production, and responsive support. As a factory-based lash supplier, Lashestar emphasizes OEM/ODM service, packing design help, and flexible production timelines, which can be useful for professionals who want both salon-ready artistry and scalable product supply.
FAQ
Are wispy lashes the same as volume lashes?
No. Wispy lashes describe the texture and layering of the set, while volume lashes describe the fan-based application method. A wispy set can be built with volume, classic, or hybrid techniques.
Why do wispy lashes look more fluttery?
They use alternating lengths and visible spikes, which adds contrast and movement instead of a flat, uniform appearance.
Do wispy lashes have to use long extensions?
No. The wispy effect comes from contrast, not length alone. A set can still look wispy with moderate lengths if the spikes are mapped clearly and the base remains controlled.
What eye shapes can wear wispy lashes?
Wispy lashes can be adapted for many eye shapes, but the final map should be adjusted to the client’s natural lashes and the look they want. Eye shape can guide the design, but retention and lash health remain the deciding factors.
What tools are commonly used to create wispy lash sets?
Common tools and products include lash trays, tweezers, lash adhesive, isolation tweezers, volume tweezers, classic extension lashes, premade or handmade fans, lash maps, and under-eye pads. The exact selection depends on whether the artist is creating a classic, hybrid, or volume wispy set.